Note: Any new folders created should be created under a root folder and should follow a structure that will make sense to other users
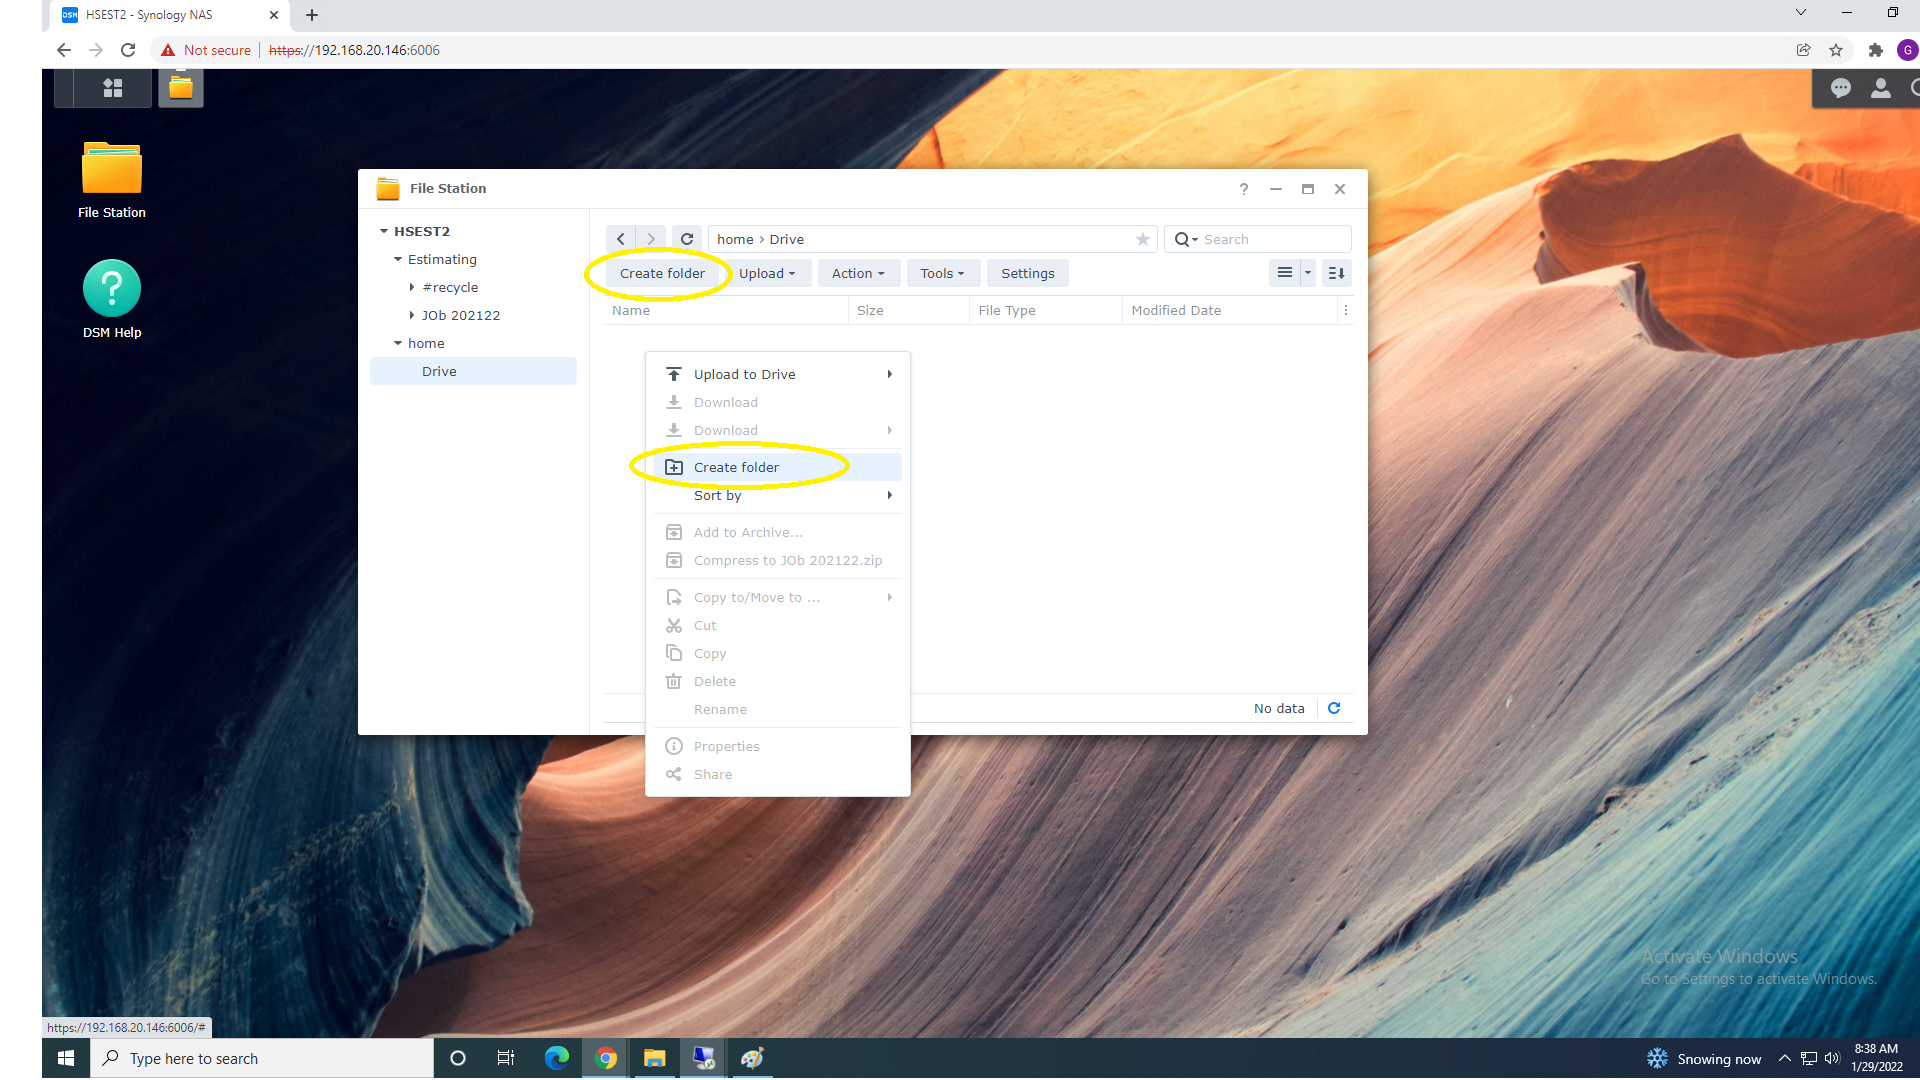
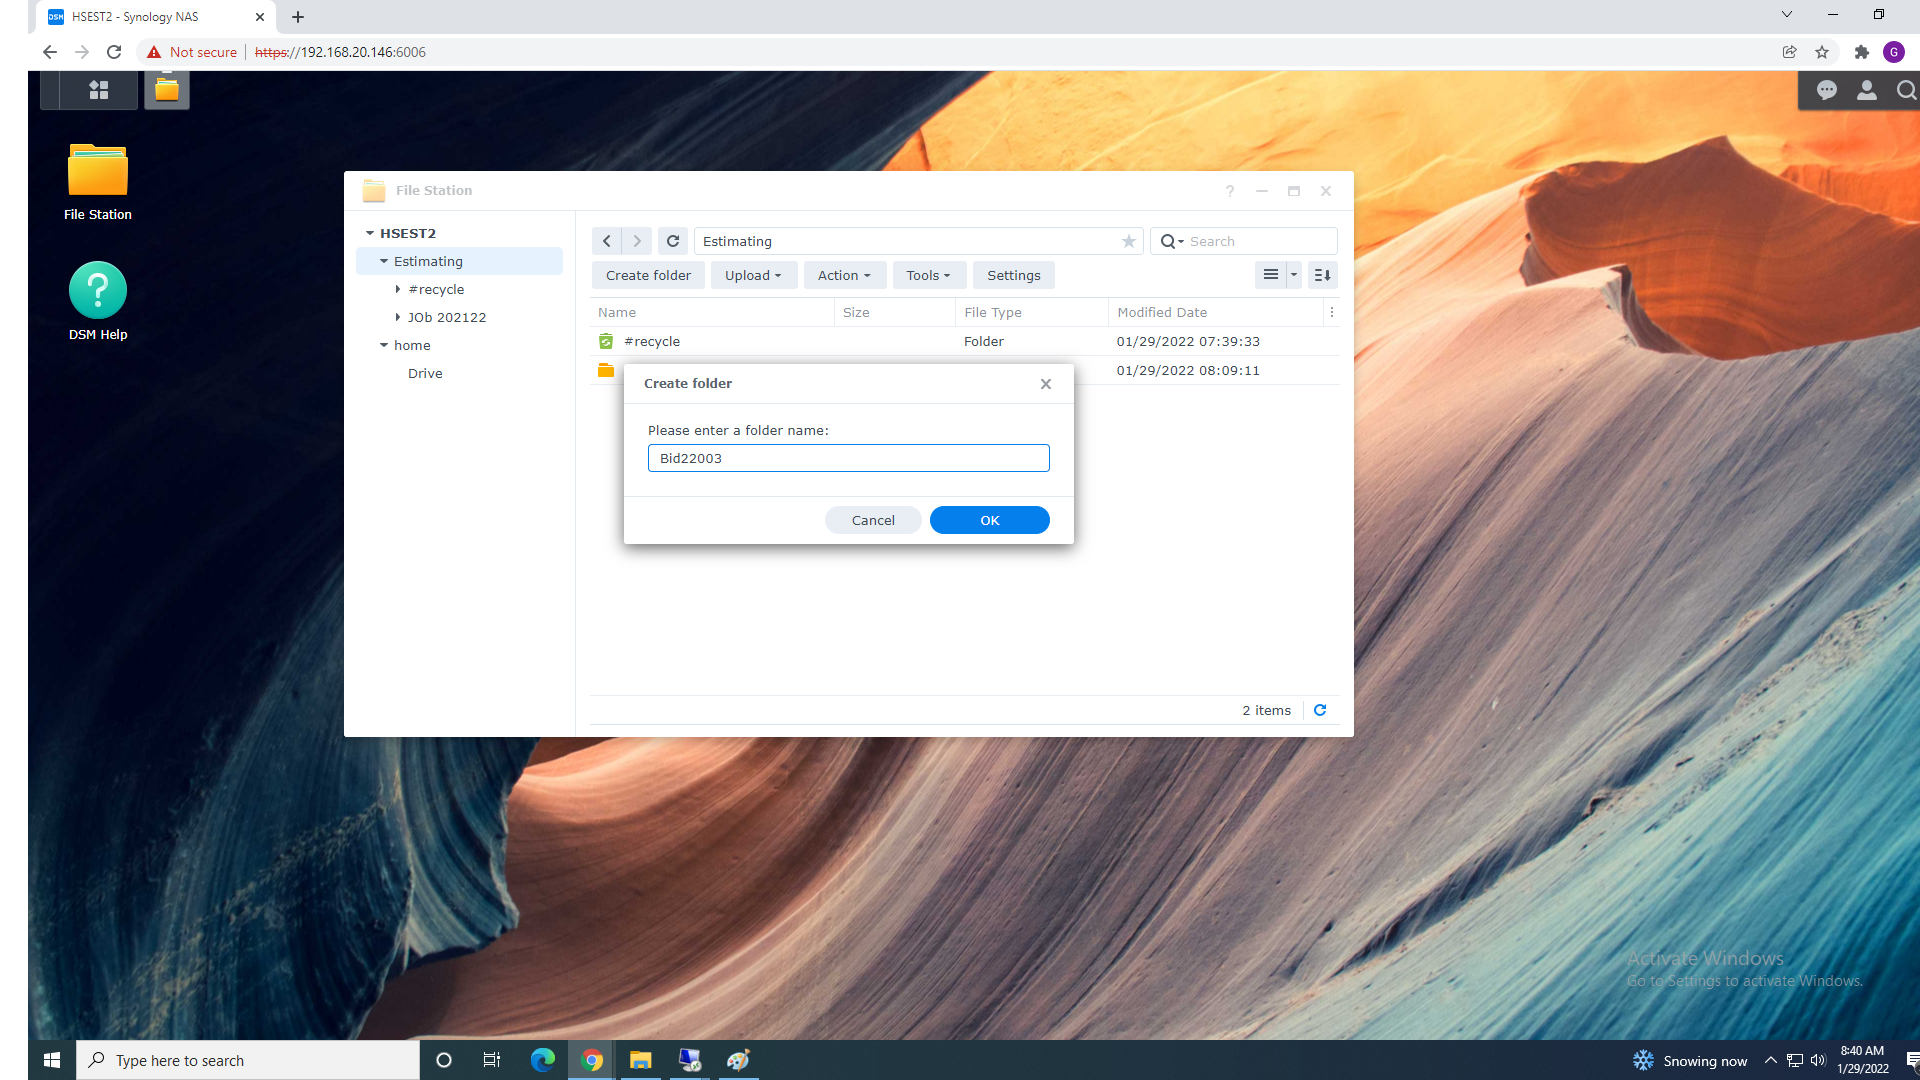
2. In This Example we are Creating folder "Bid22003" Inside Estimating Folder ... Folder Name will
reflect company Standards.
3. Please make sure you are uploading files to correct Folder.
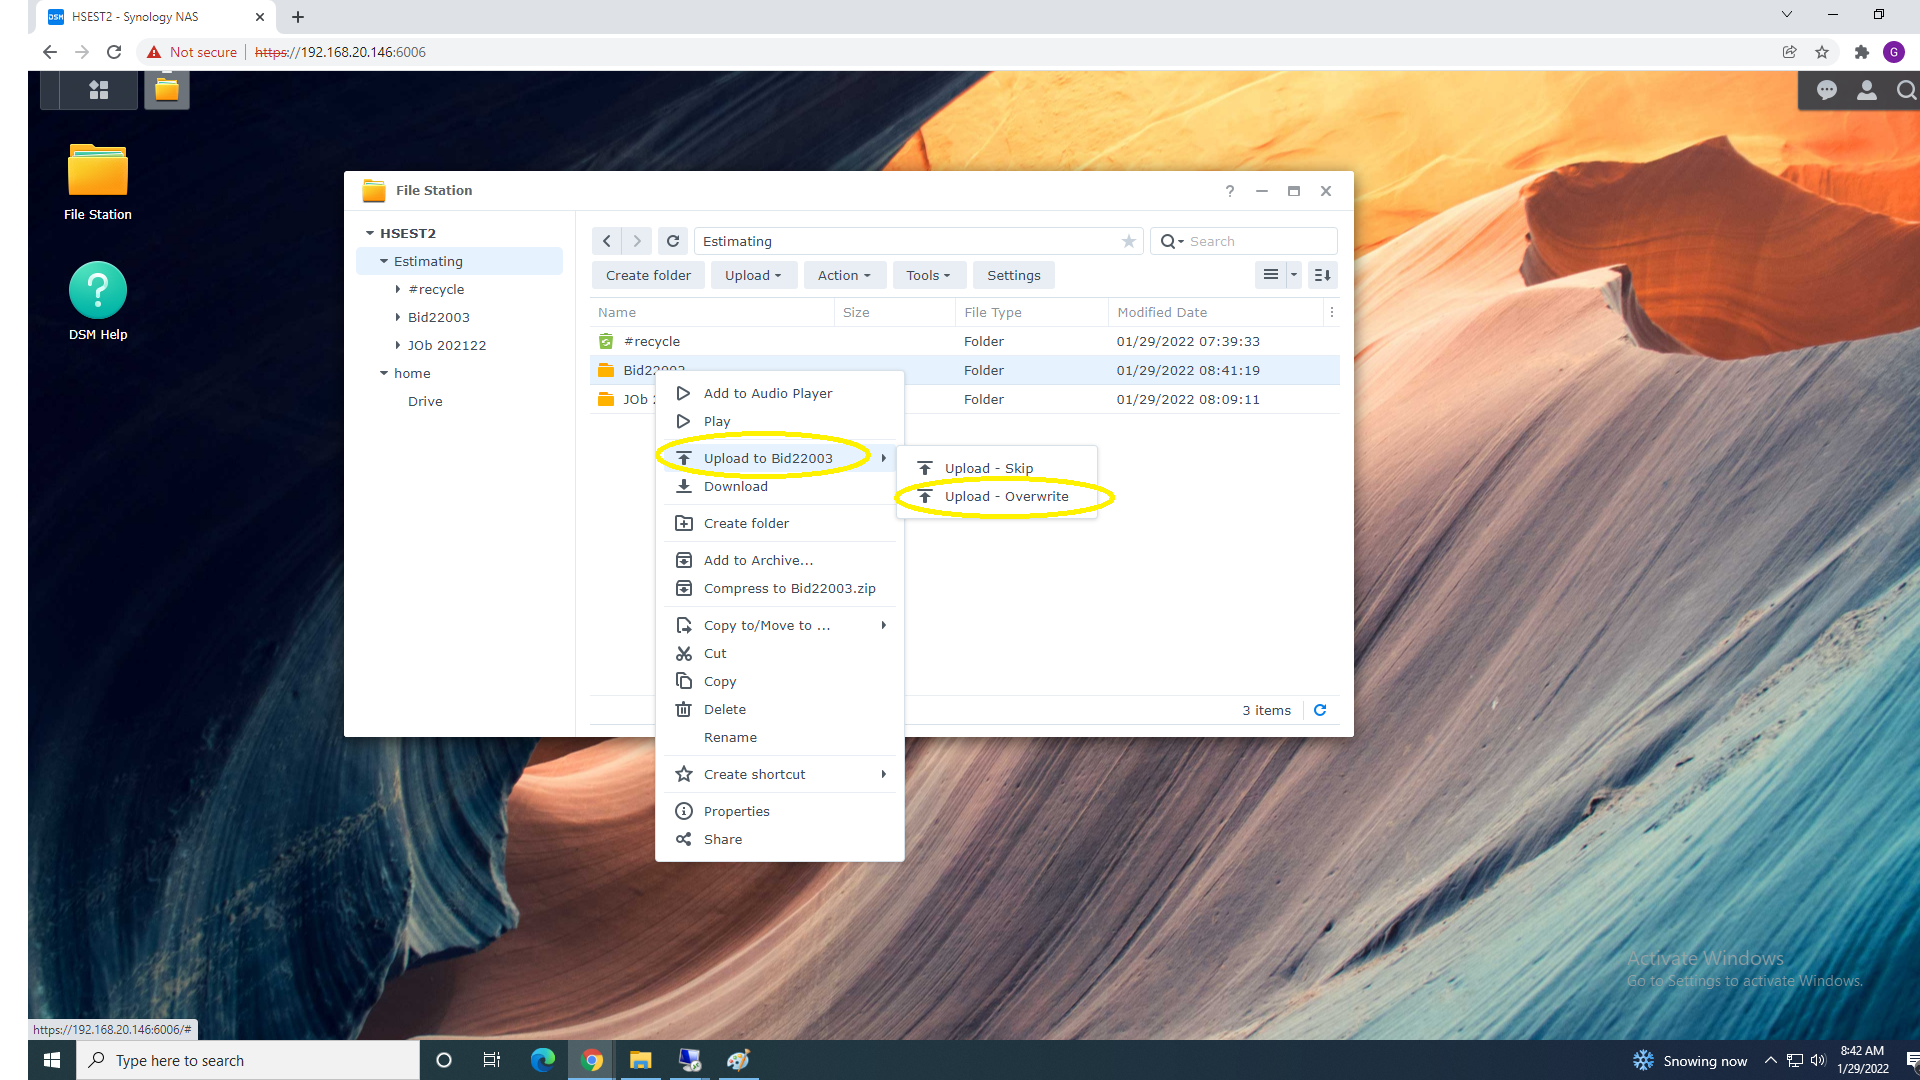
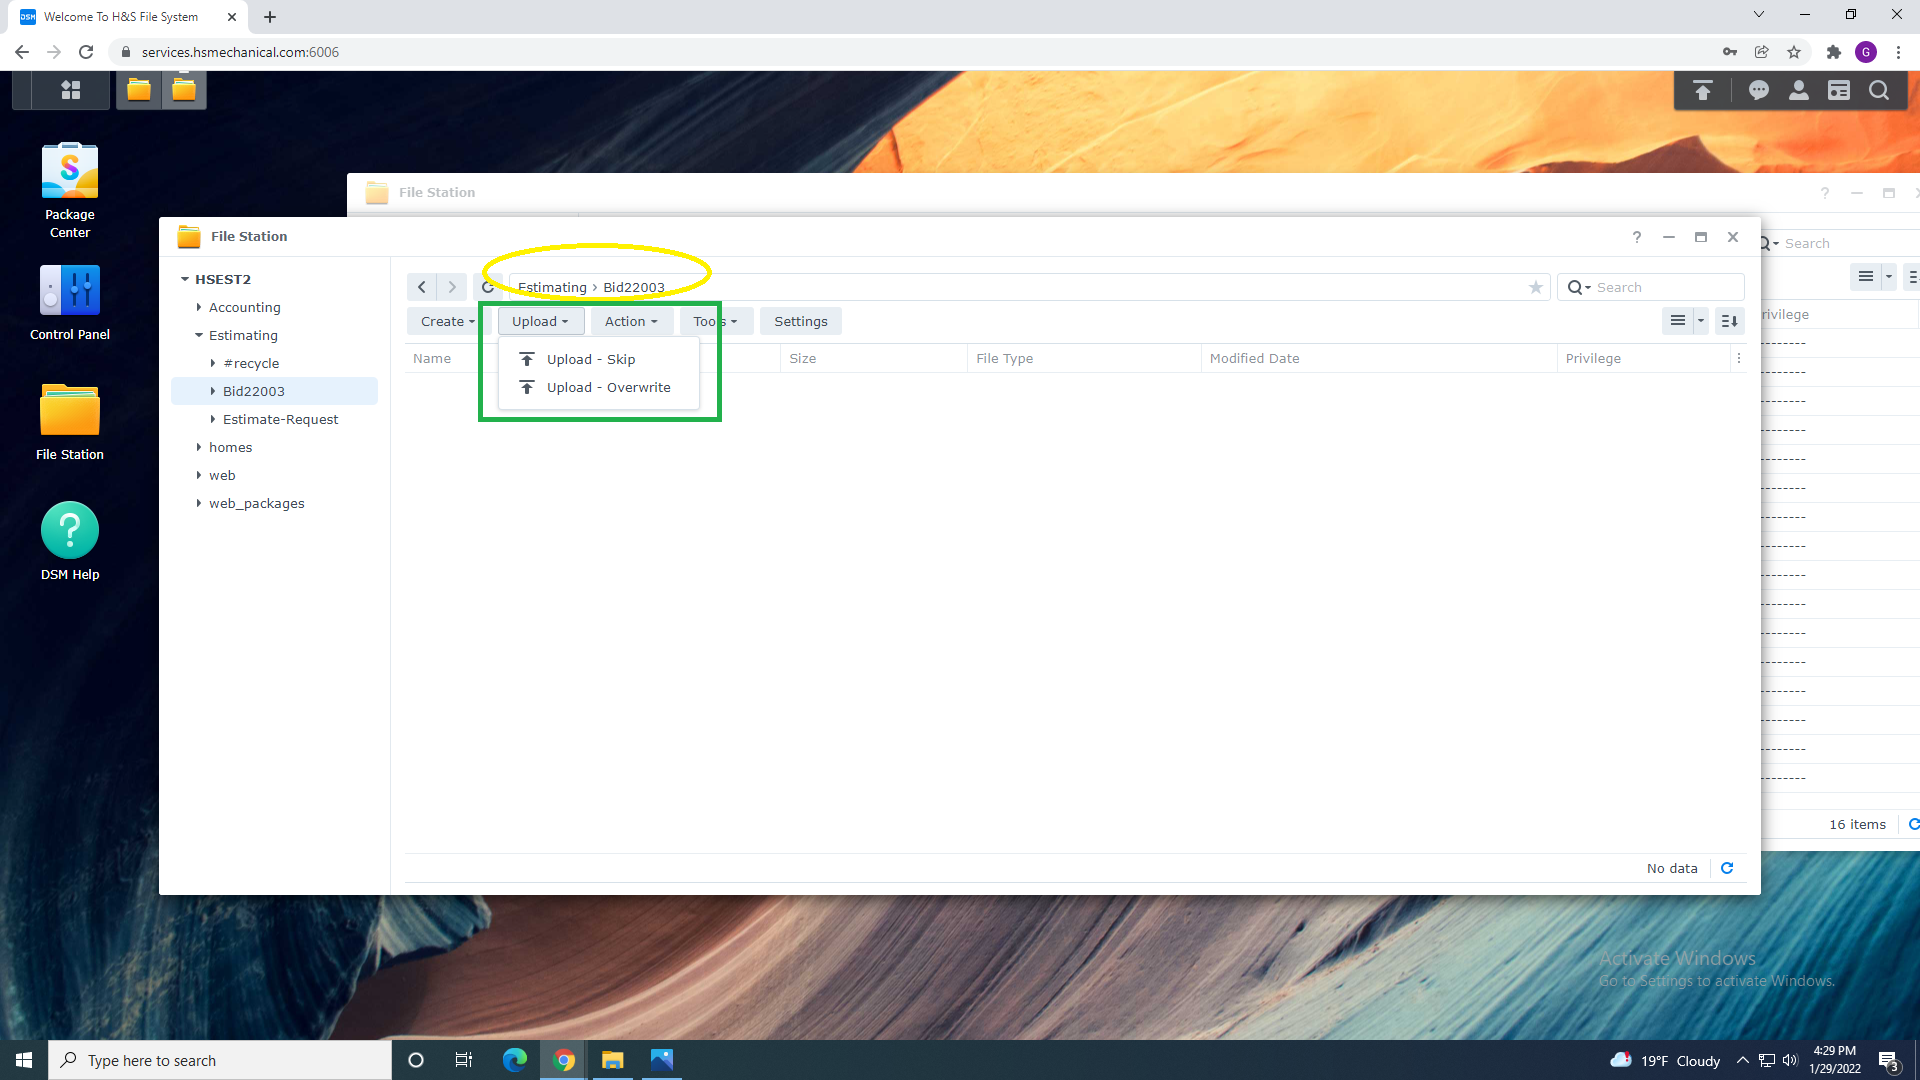
4. Upload file you want to share to folder in our Example is Folder "Bid22003" by selecting Upload files or Right Clicking inside of a folder and select Upload Override or Upload Skip
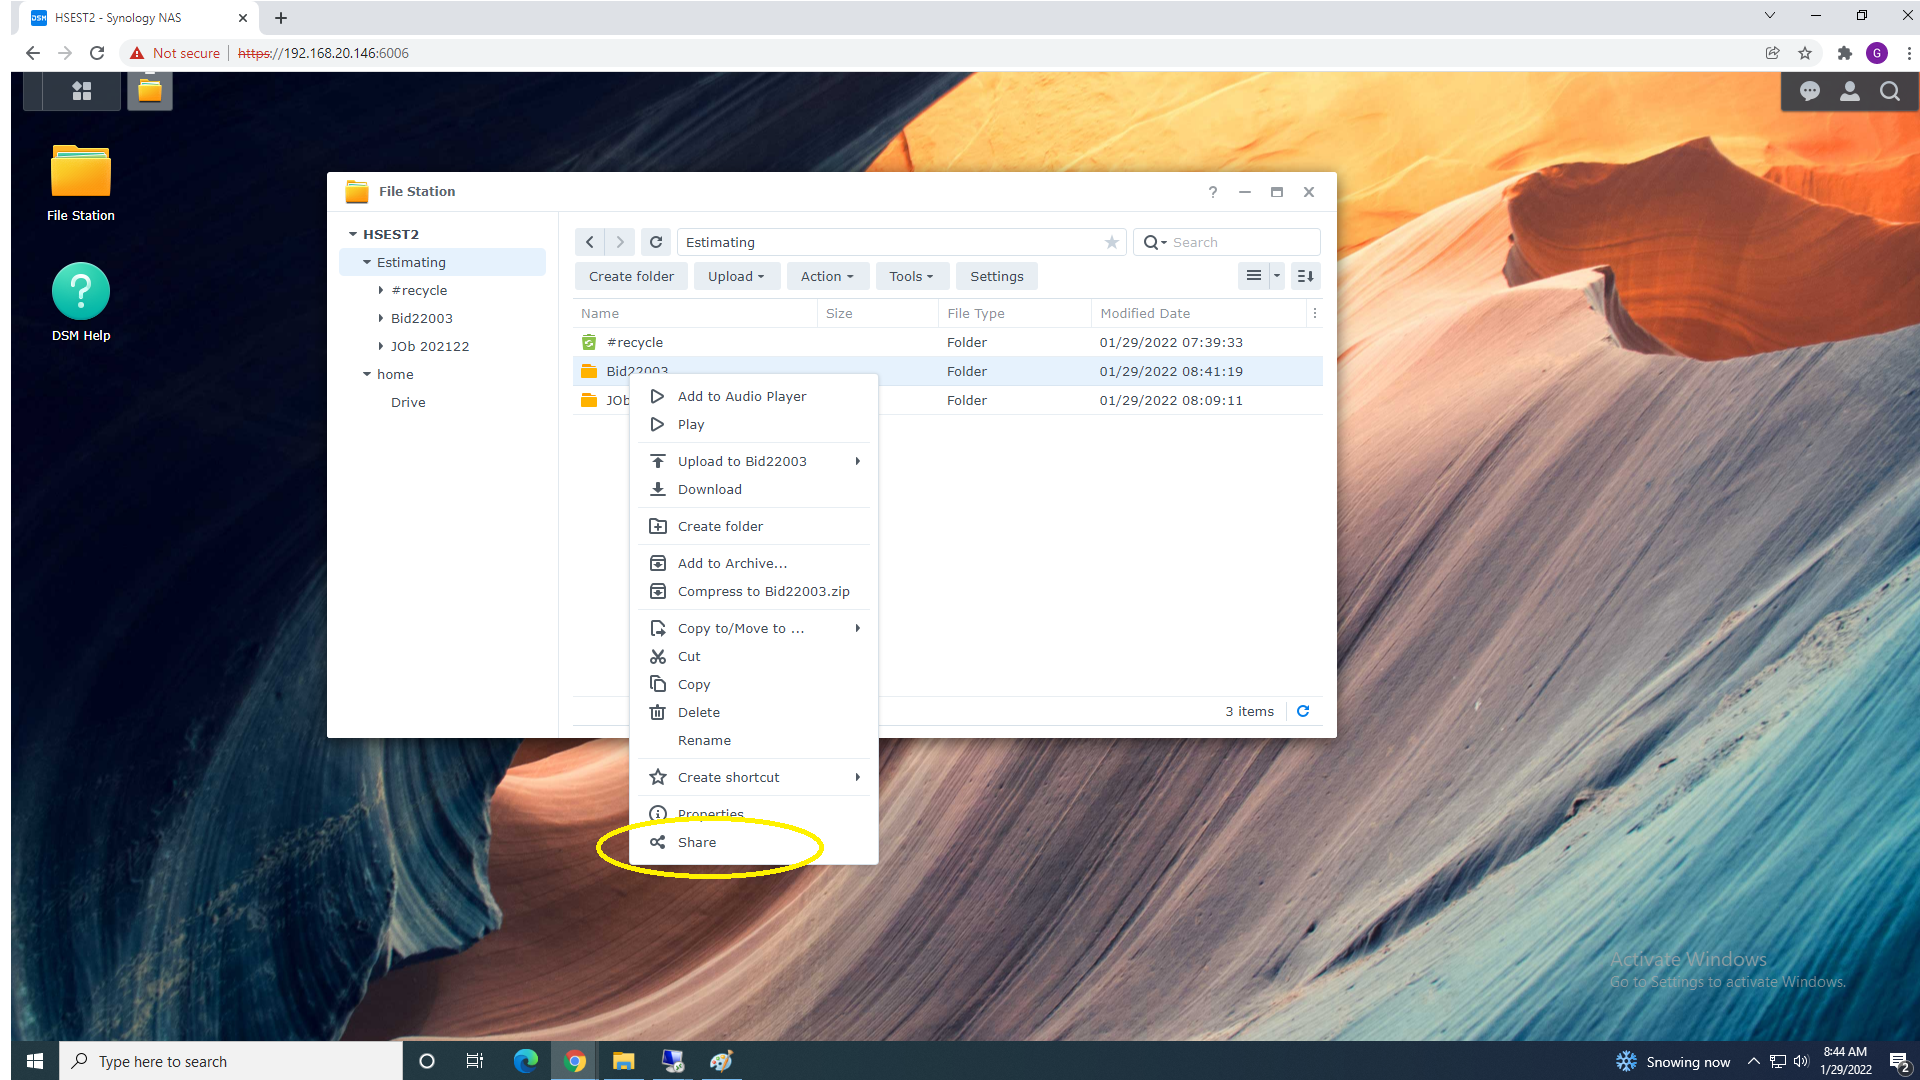
5. Once files are uploaded you can Share the entire folder: Here we are Sharing Entire "Bid22003" folder
By right Clicking and Selecting Share from the menu.
6. You can also share Folder by Selecting Action Menu :
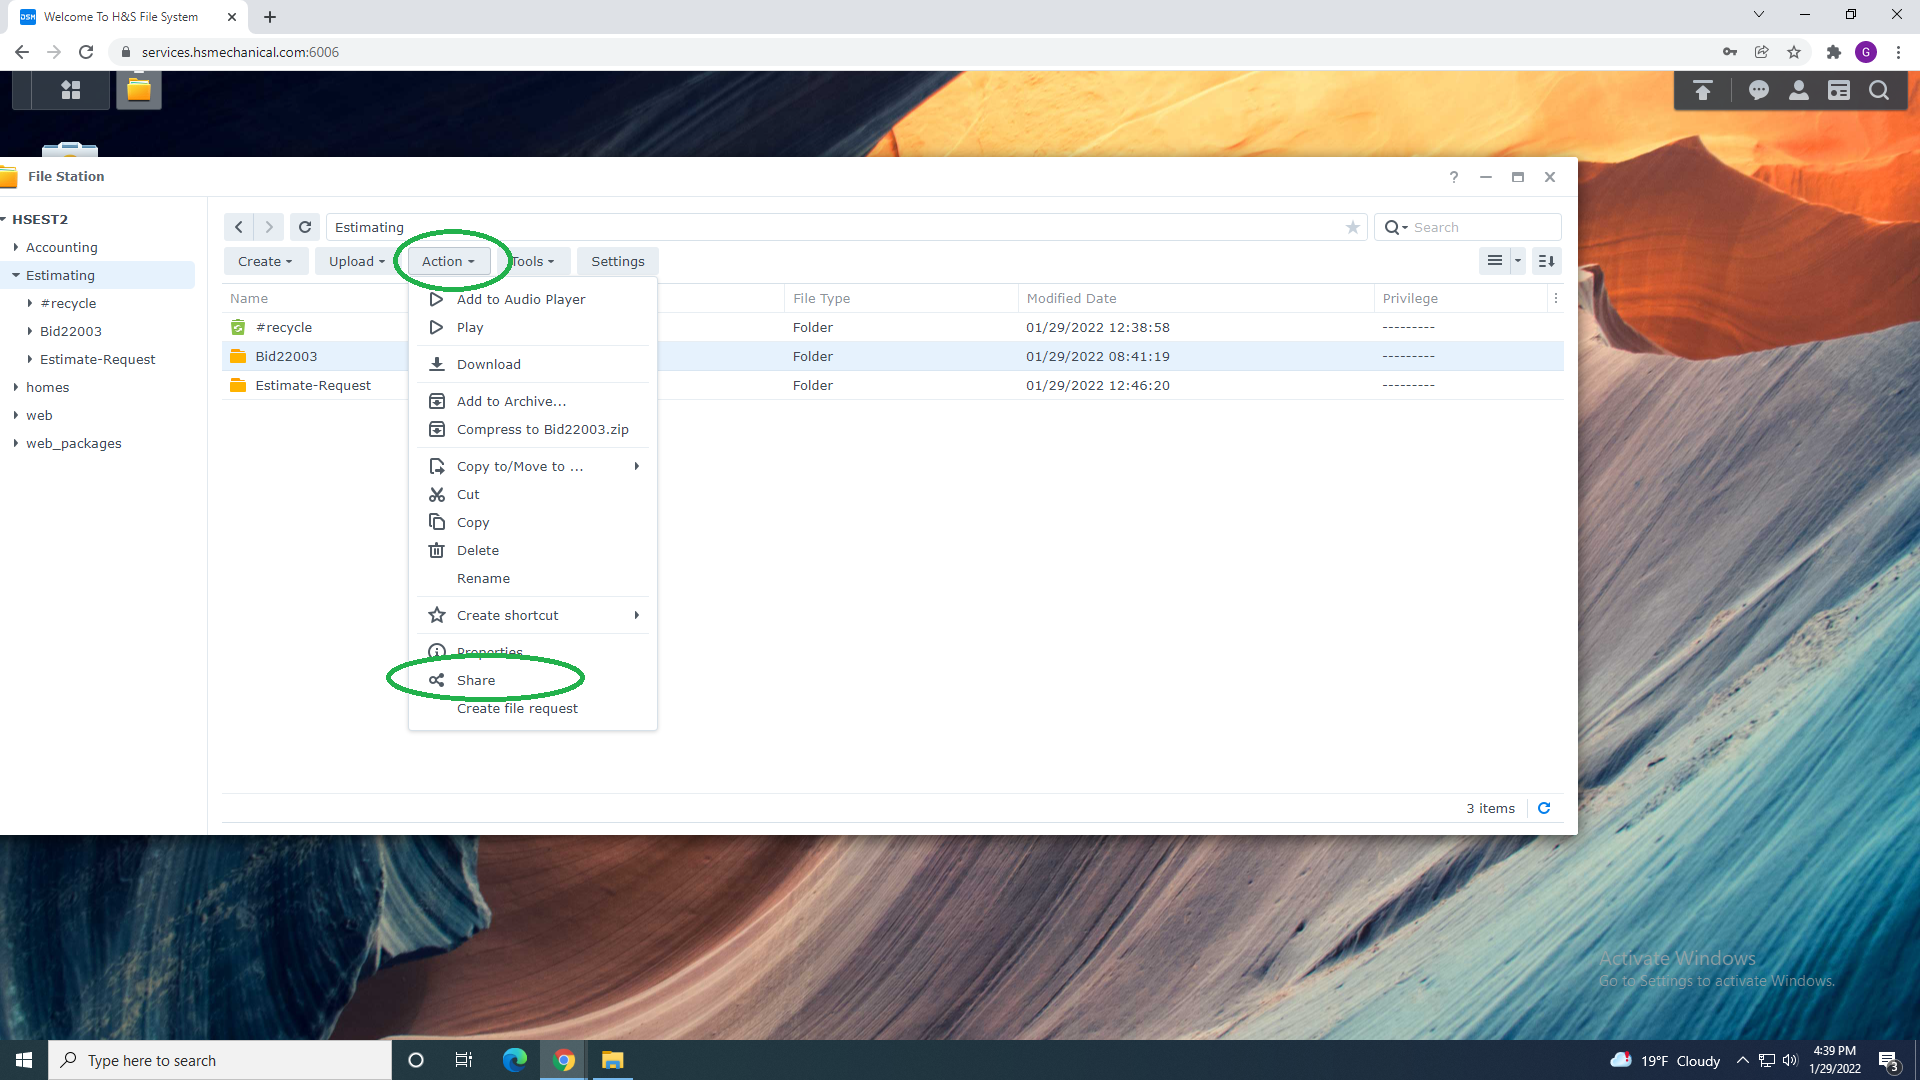
7. Once Selected New Menu Will Appear with Share Functions.
You can share folders by email, link or QR code more information can be found in ‘Sharing Functions Explained’ article.
Please Read and understand ALL Share Functions
by selecting this article Folder share Functions and continue Reading.
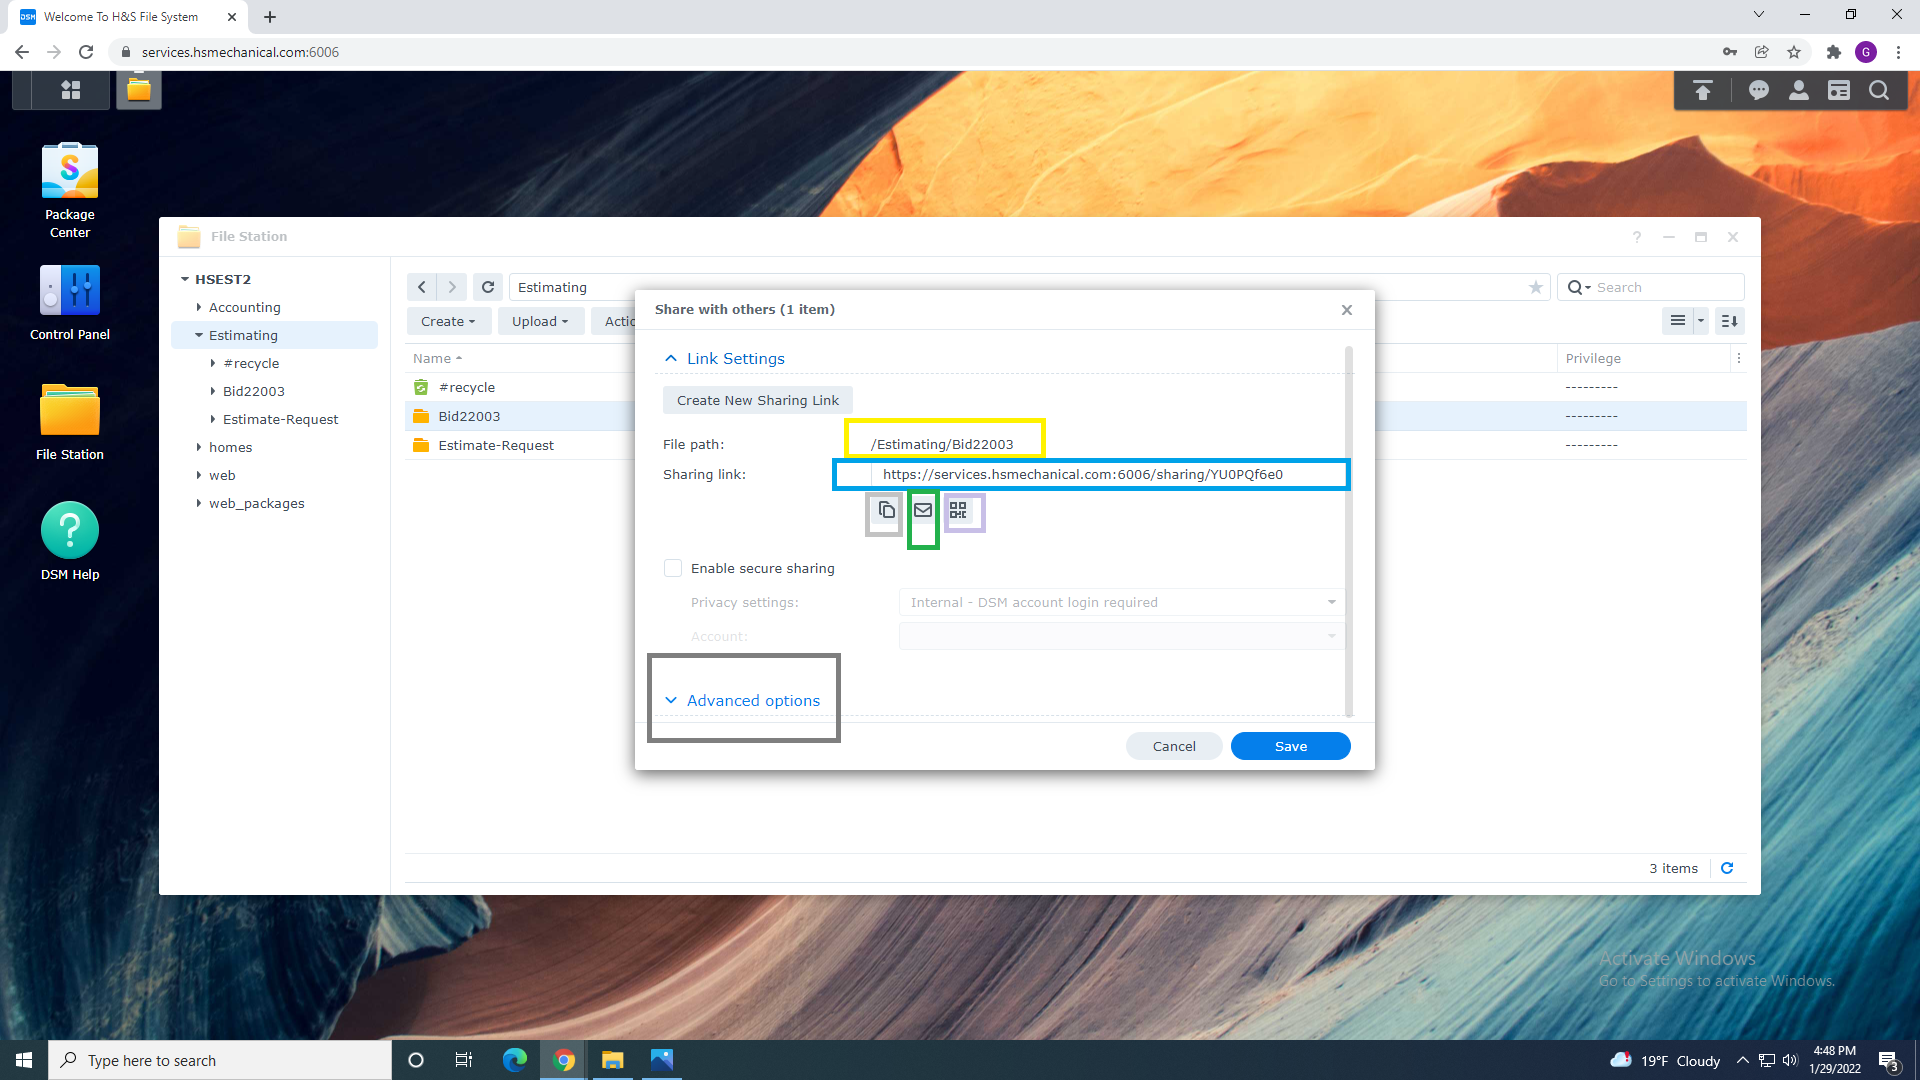
Verify That you sharing Correct Folder Shown above in "Yellow "
7A. File Path = Yellow
7B. Share Link = Blue
7C. Share Link Copy = Light Gray
7D. Send Share Email = Green
7E. QR Code= Pink
7F. Advanced Options = Dark Gray - Please Read Share Folder Functions